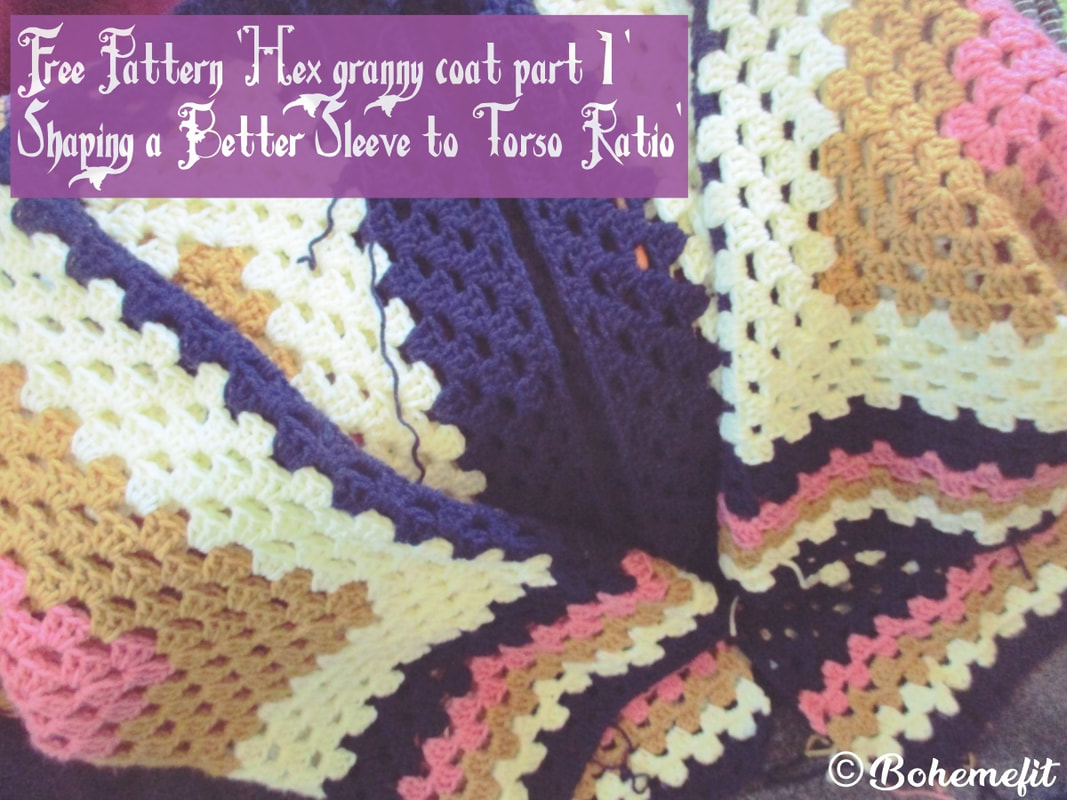
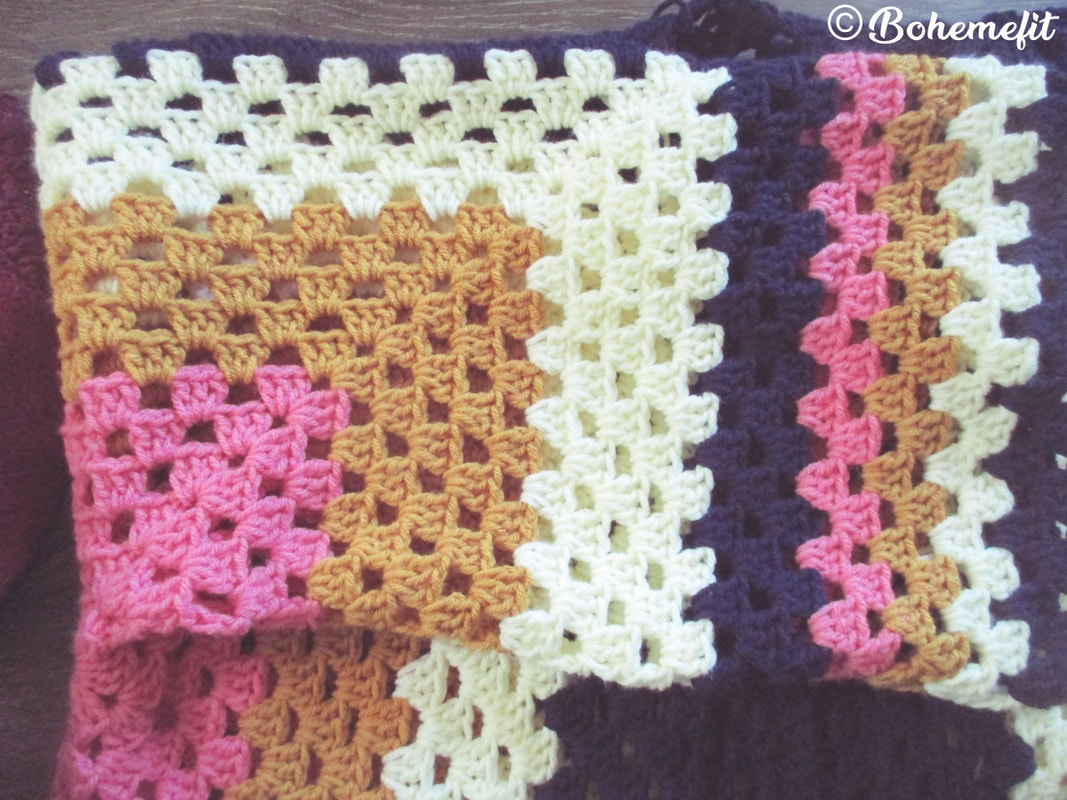
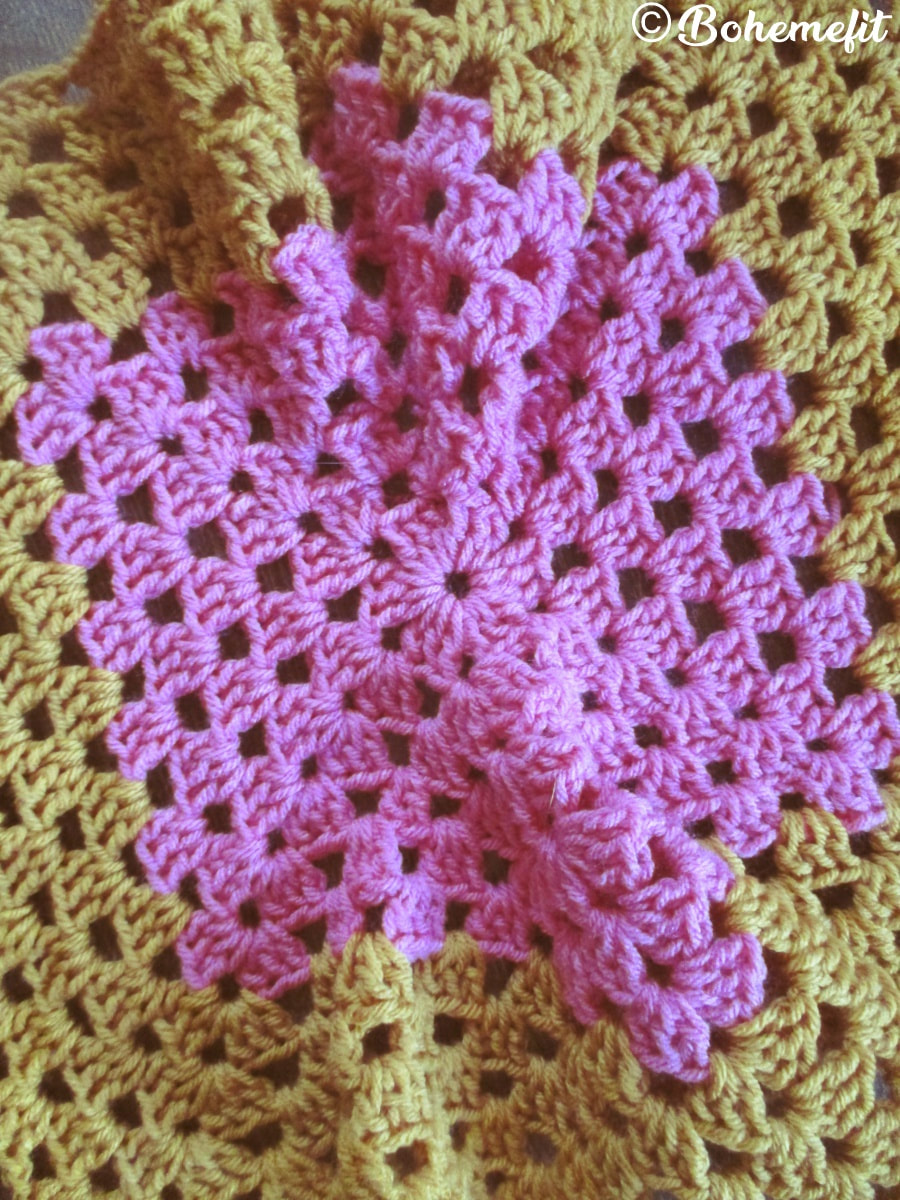
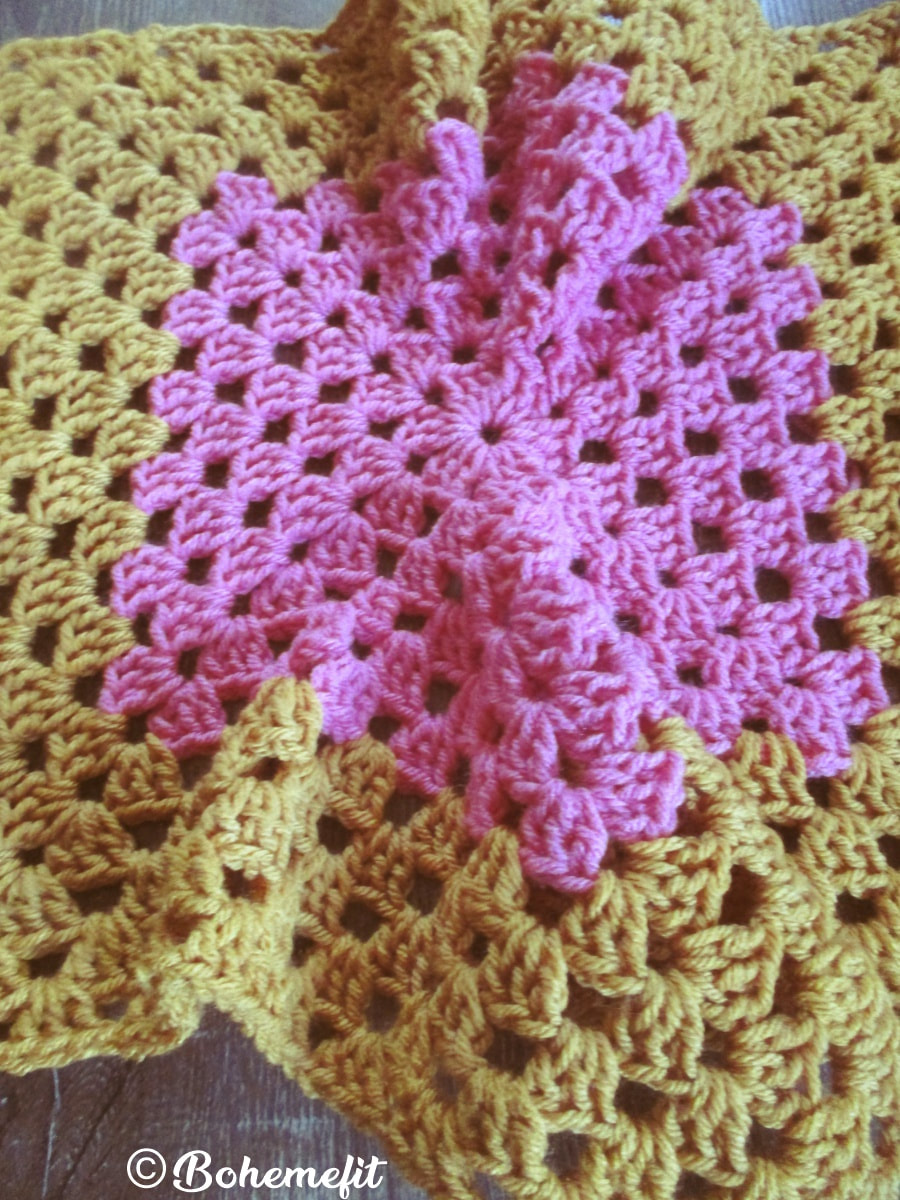
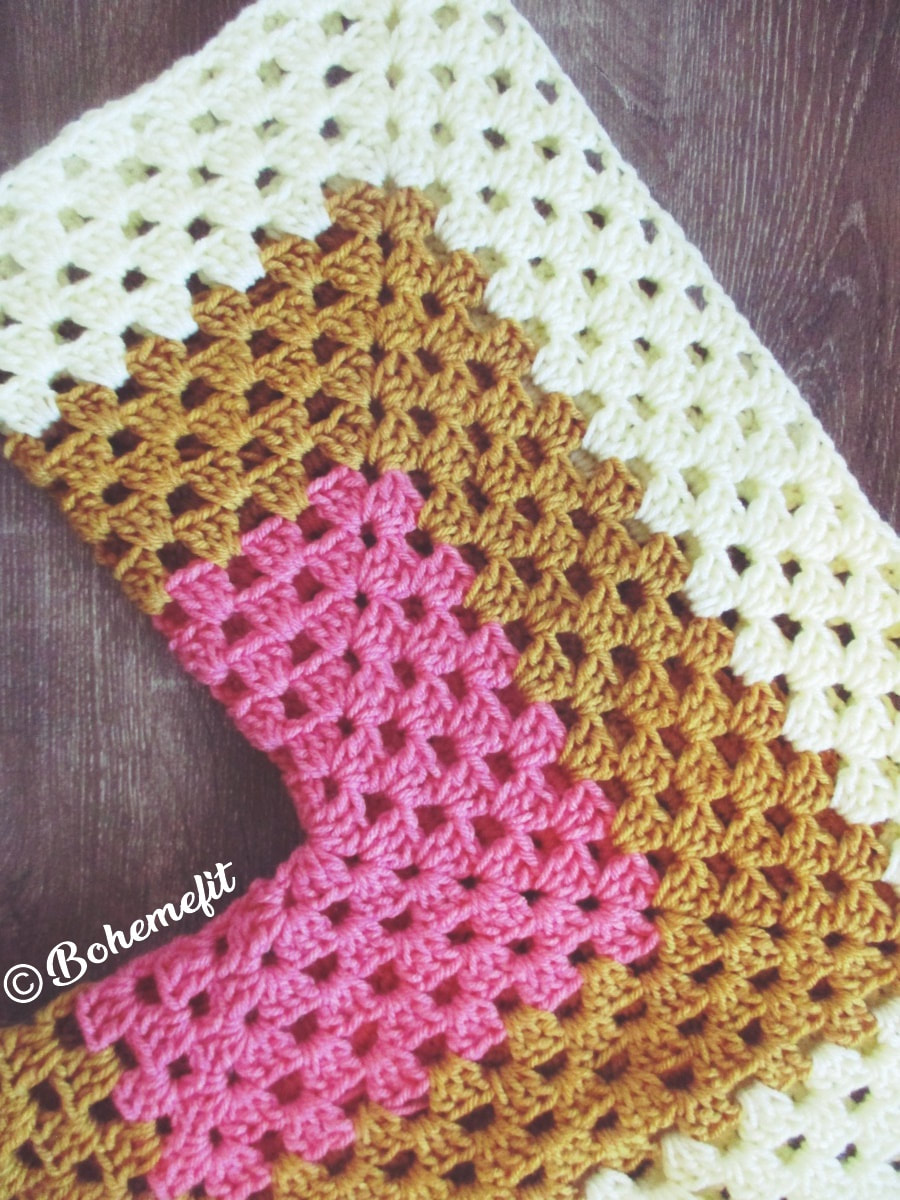
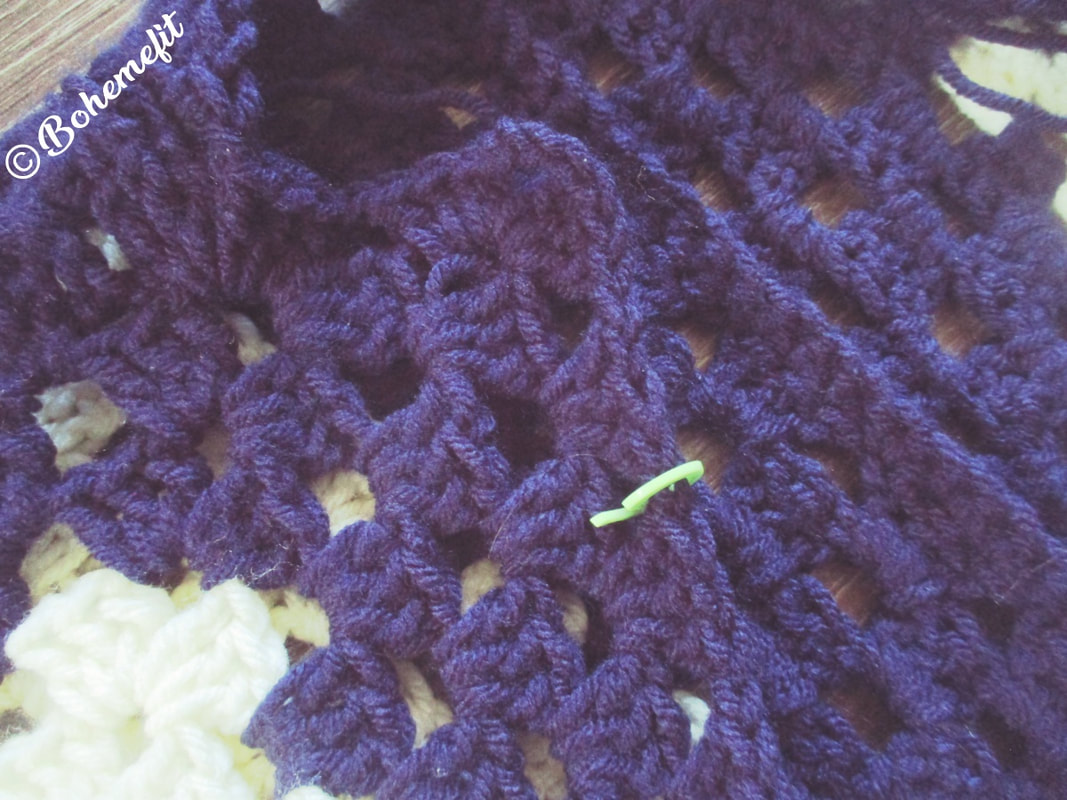
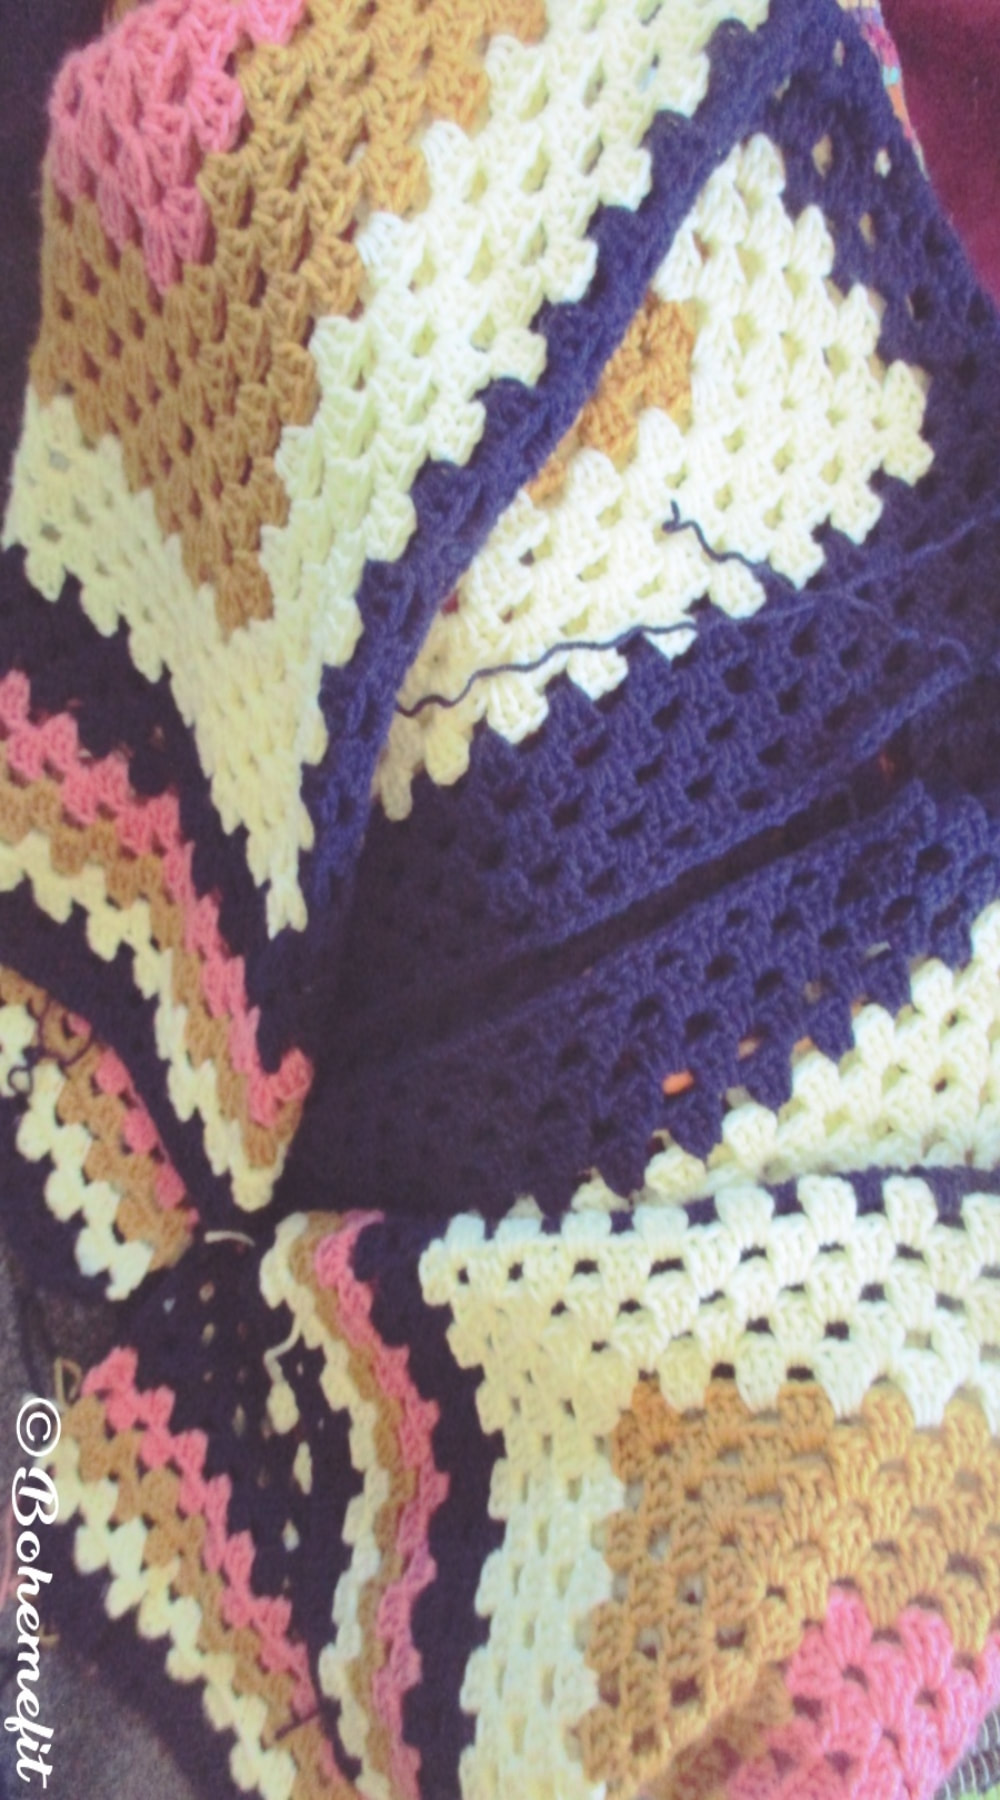
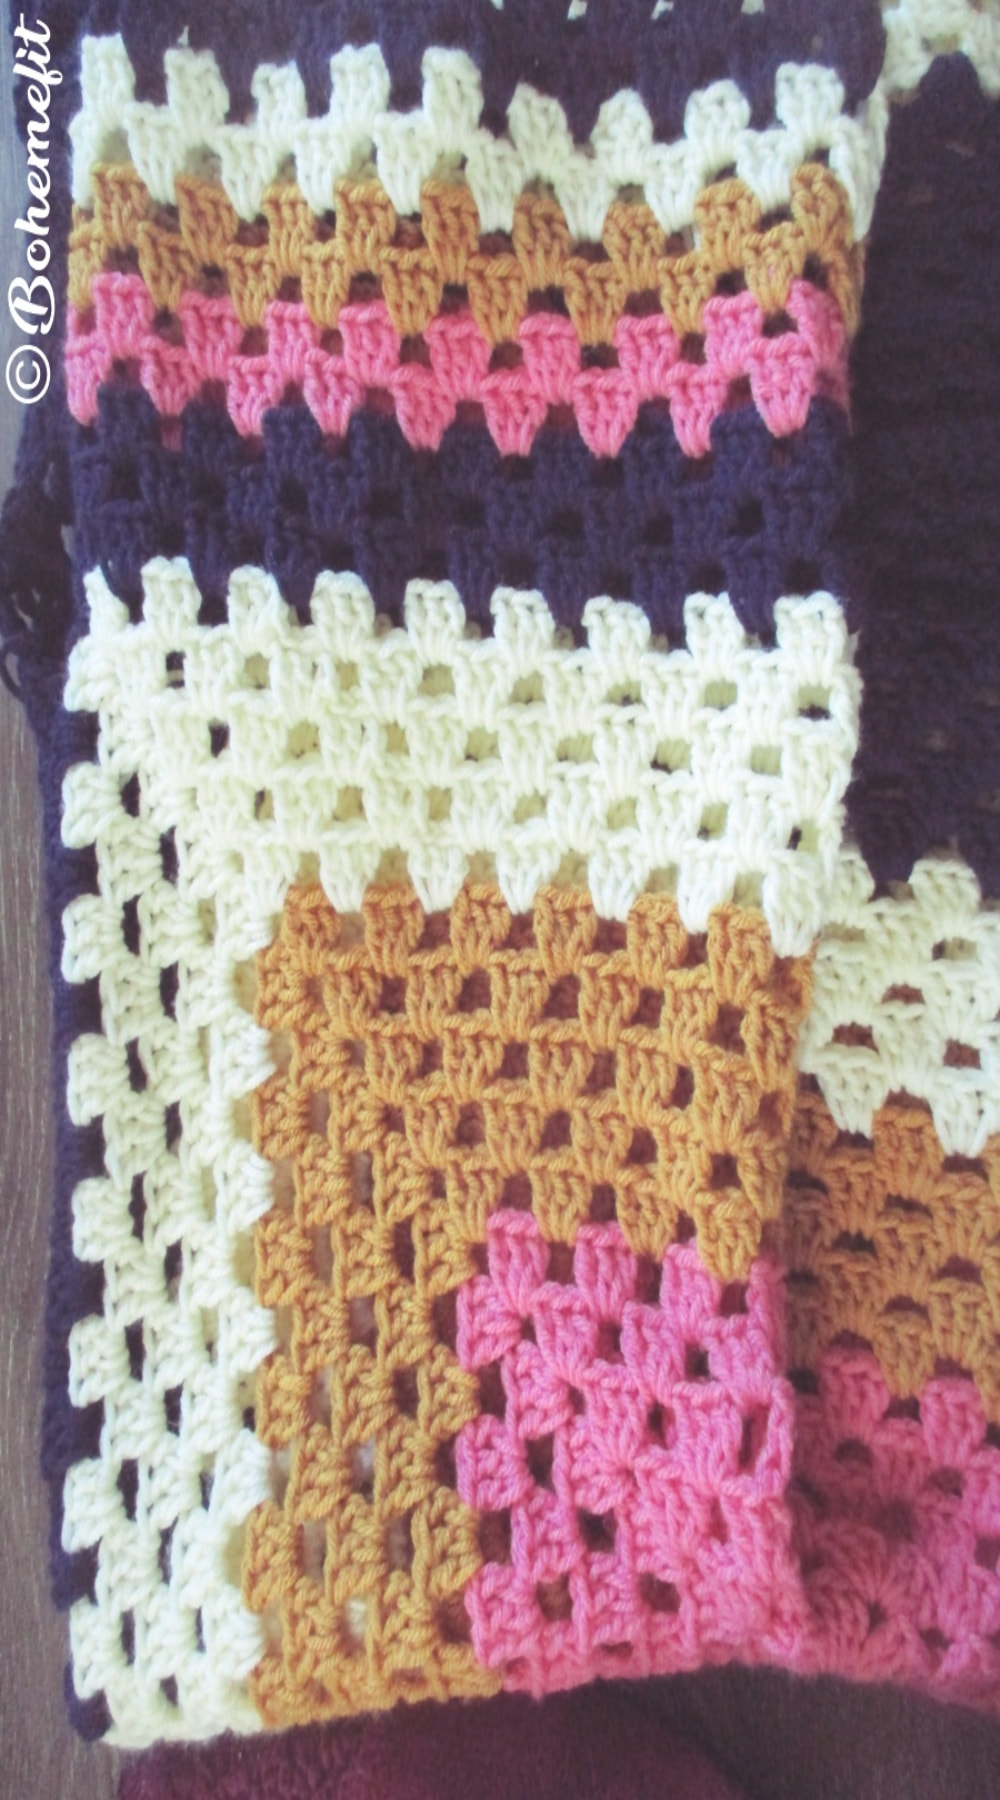
 A heavy bulky coat, perfect for temp drops in the evening, using a 5mm crochet hook and a medium weight garn with clusters of 3dc, ch 1 with dc3/ch2/dc3 at the corners. Posted in three parts, my version of the Hex coat has a better shaped sleeve to torso ratio with shaped hood, finishes and edging slipped in one large boxy size which doubles as a cozy wearable throw at night. Please Note: This is my first Hexagon Granny Coat and that I will tweak the second time round with a different colorway, at some point. The CAL Parts
MaterialsMedium weight garn in:
Tools
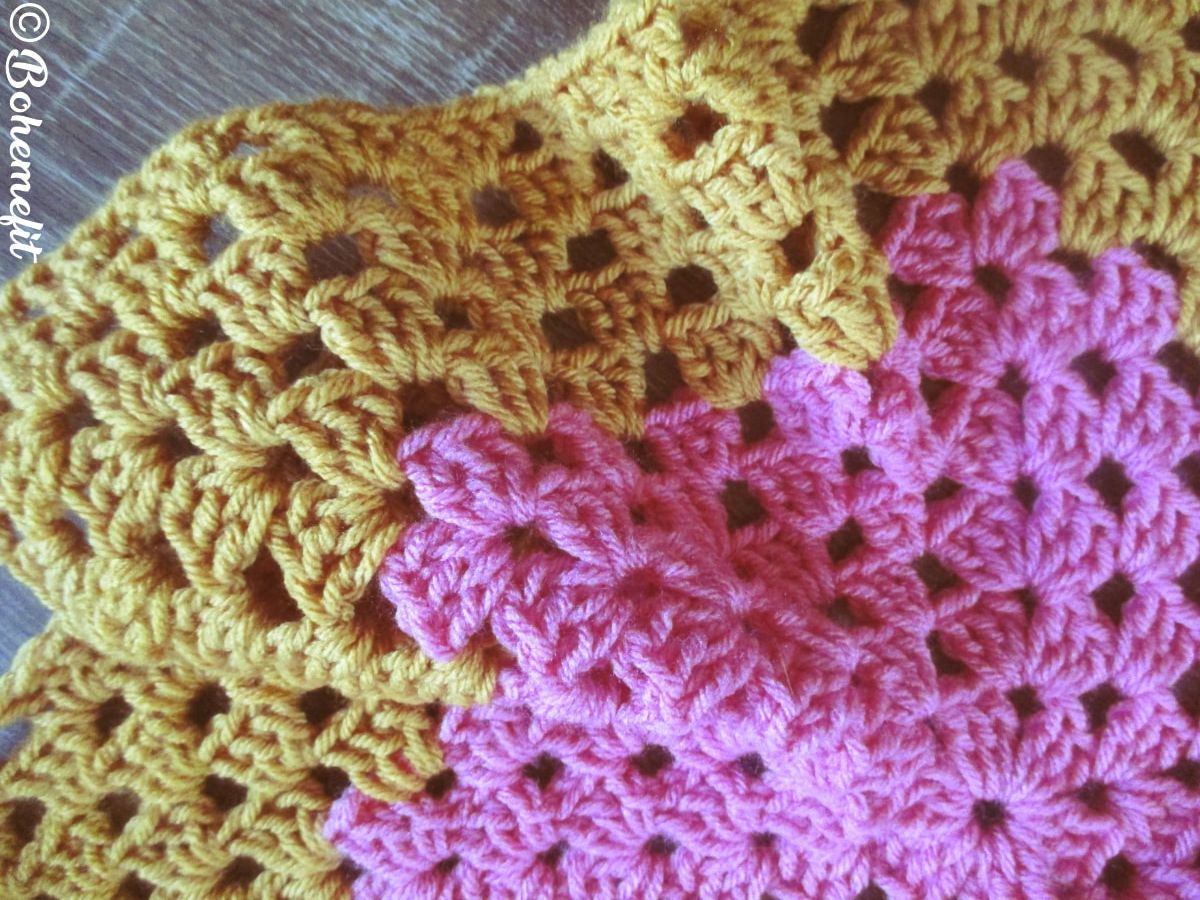
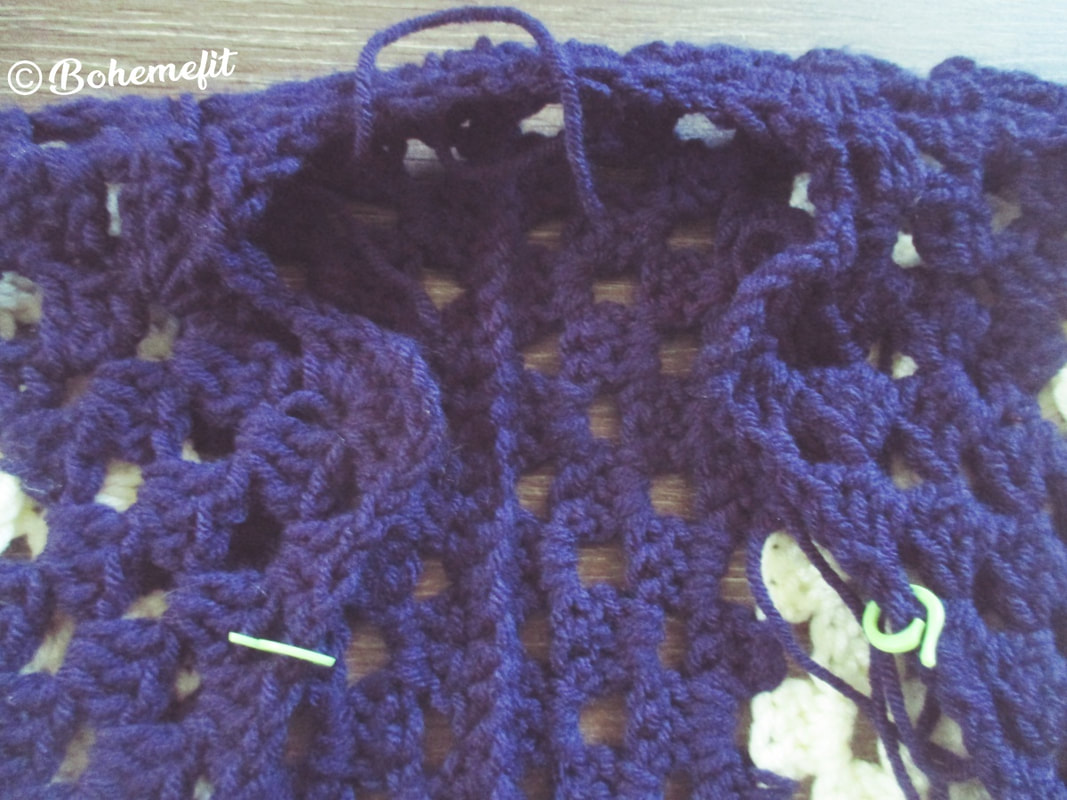
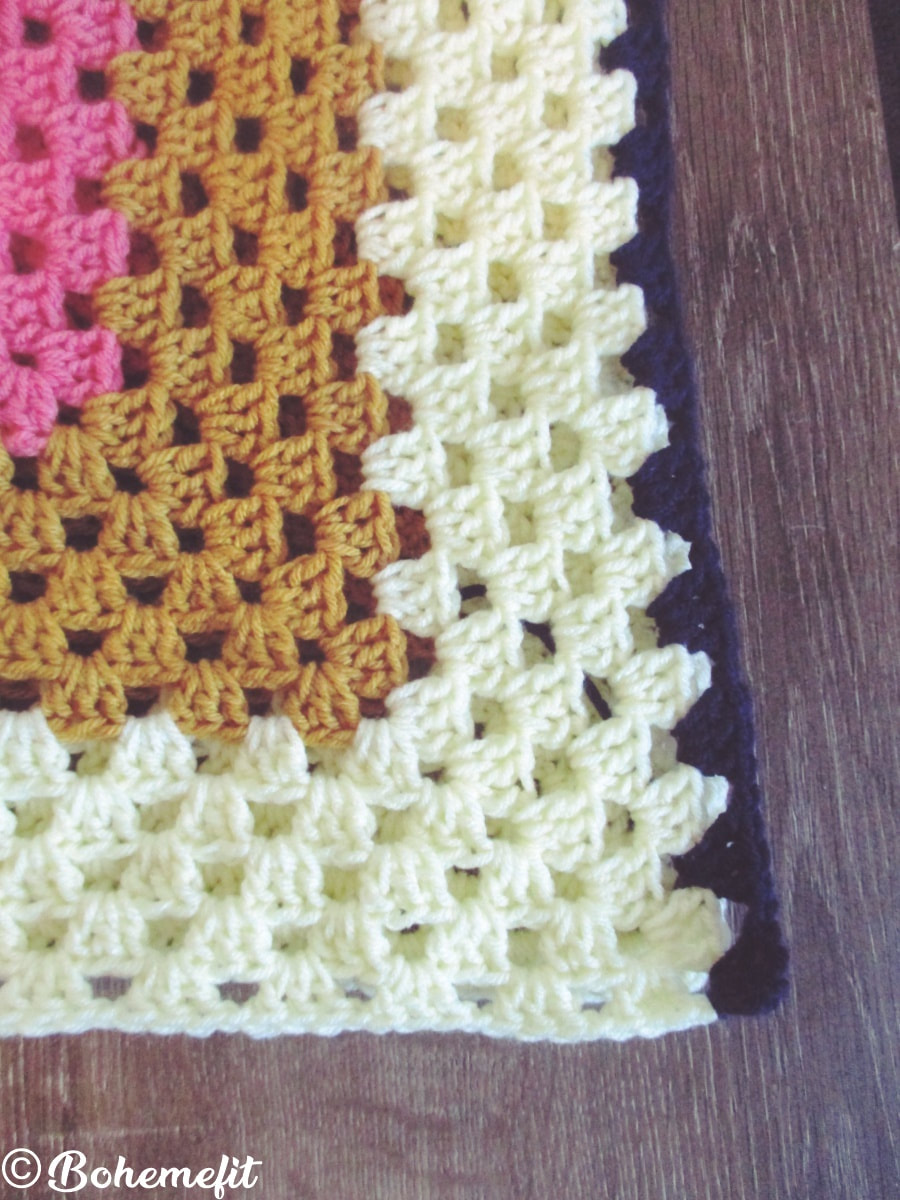
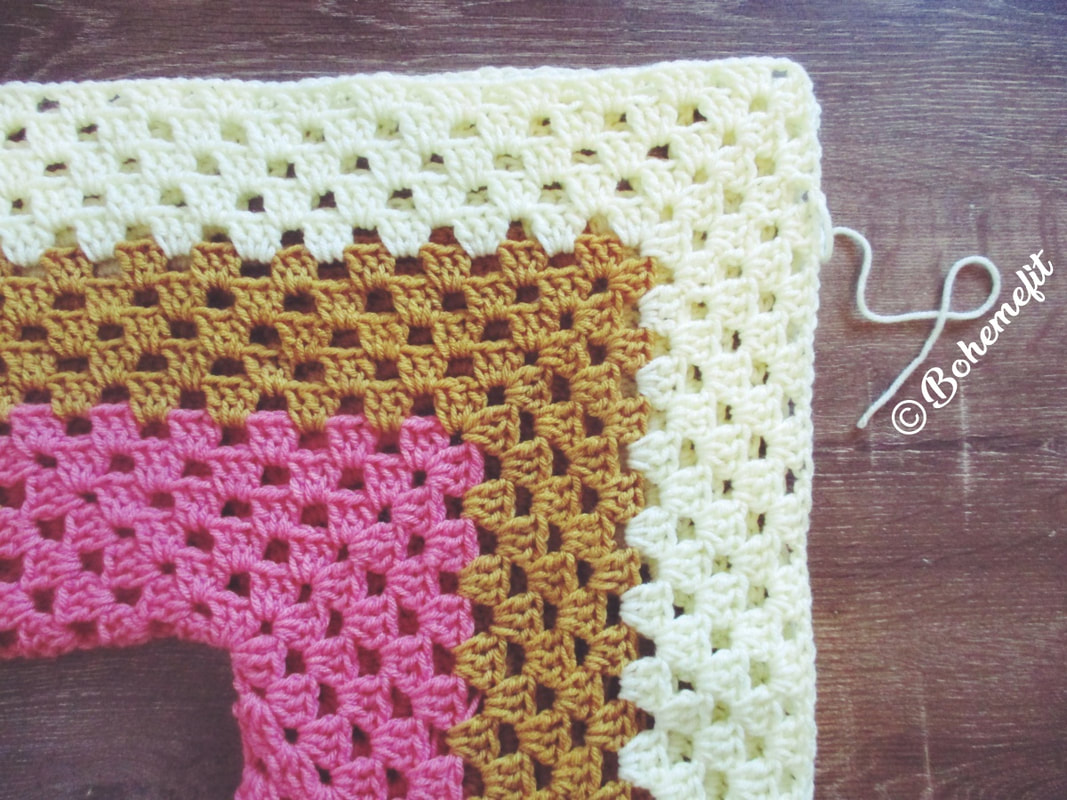
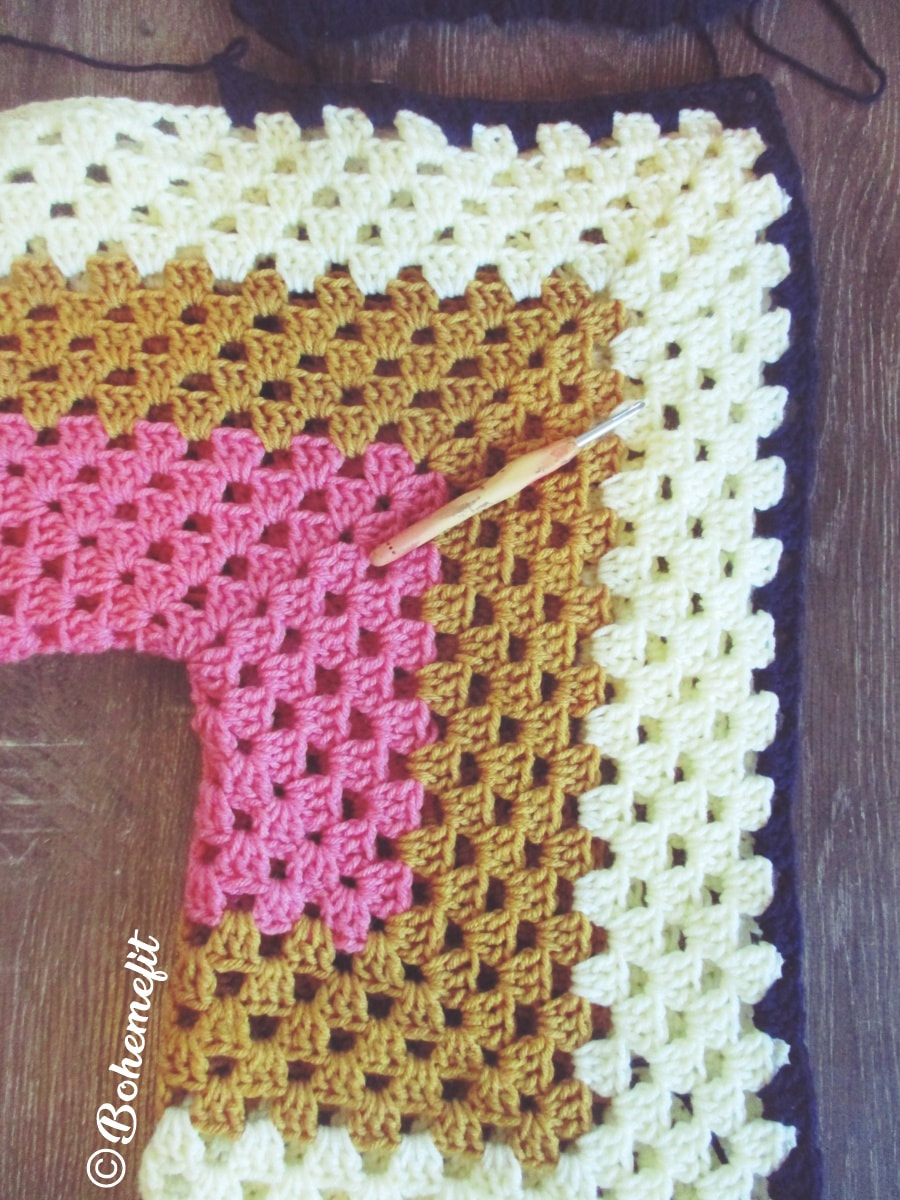
MethodLeft HexIn Blush pink... Rounds 1) 4ch and slip to fist chain to form ring. Ch2 (forms first dc and the first double crochet bar in every round here on), dc2, ch1, *dc3, ch1* x5, slip st to top of beginning ch2 of round (dc into the ring including tail/continue including tail to pull and secure the ring when ends are sewn in) 2) slip to ch2 space, sc around and ch2, dc2, ch2, dc3, ch1 *dc3, ch2, dc3 into corner space, ch1* x5, slip st to top of beginning ch2 of round 3) slip to ch2 space, sc around and ch2 dc2 ch2 dc3 ch1, dc3 around next ch1 space ch1 *dc3, ch2, dc3 into next corner space, ch1, dc3 in ch1 space, ch1* x5, slip st to top of beginning ch2 of round 4) slip to ch2 space, sc around and ch2 dc2 ch2 dc3 ch1, (dc3 around next ch1 space ch1 x2) *dc3 ch2 dc3 into next corner space ch1, (dc3 in next ch1 space ch1 x2)* x5, slip st to top of beginning ch2 of round 5) slip to ch2 space, sc around and ch2 dc2 ch2 dc3 ch1, (dc3 around next ch1 space ch1 x3) *dc3 ch2 dc3 into next corner space ch1, (dc3 in next ch1 space ch1 x3)* x5, slip st to top of beginning ch2 of round 6) slip to ch2 space, sc around and ch2 dc2 ch2 dc3 ch1, (dc3 around next ch1 space ch1 x4) *dc3 ch2 dc3 into next corner space ch1, (dc3 in next ch1 space ch1 x4)* x5, slip st to top of beginning ch2 of round. Sew in ends Tie in to a space Mustard Rounds, as above increasing naturally as you progress 7) slip to ch2 space, sc around and ch2 dc2 ch2 dc3 ch1, (dc3 around next ch1 space ch1 x5) *dc3 ch2 dc3 into next corner space ch1, (dc3 in next ch1 space ch1 x5)* x5, slip st to top of beginning ch2 of round. 8) slip to ch2 space, sc around and ch2 dc2 ch2 dc3 ch1, (dc3 around next ch1 space ch1 x6) *dc3 ch2 dc3 into next corner space ch1, (dc3 in next ch1 space ch1 x6)* x5, slip st to top of beginning ch2 of round. 9) slip to ch2 space, sc around and ch2 dc2 ch2 dc3 ch1, (dc3 around next ch1 space ch1 x7) *dc3 ch2 dc3 into next corner space ch1, (dc3 in next ch1 space ch1 x7)* x5, slip st to top of beginning ch2 of round. 10) slip to ch2 space, sc around and ch2 dc2 ch2 dc3 ch1, (dc3 around next ch1 space ch1 x8) *dc3 ch2 dc3 into next corner space ch1, (dc3 in next ch1 space ch1 x8)* x5, slip st to top of beginning ch2 of round. 11) slip to ch2 space, sc around and ch2 dc2 ch2 dc3 ch1, (dc3 around next ch1 space ch1 x9) *dc3 ch2 dc3 into next corner space ch1, (dc3 in next ch1 space ch1 x9)* x5, slip st to top of beginning ch2 of round. Sew in ends Tie in to a space Cream Rounds, as above increasing naturally as you progress 12) slip to ch2 space, sc around and ch2 dc2 ch2 dc3 ch1, (dc3 around next ch1 space ch1 x10) *dc3 ch2 dc3 into next corner space ch1, (dc3 in next ch1 space ch1 x10)* x5, slip st to top of beginning ch2 of round 13) slip to ch2 space, sc around and ch2 dc2 ch2 dc3 ch1, (dc3 around next ch1 space ch1 x11) *dc3 ch2 dc3 into next corner space ch1, (dc3 in next ch1 space ch1 x11)* x5, slip st to top of beginning ch2 of round 14) slip to ch2 space, sc around and ch2 dc2 ch2 dc3 ch1, (dc3 around next ch1 space ch1 x12) *dc3 ch2 dc3 into next corner space ch1, (dc3 in next ch1 space ch1 x12)* x5, slip st to top of beginning ch2 of round 15) slip to ch2 space, sc around and ch2 dc2 ch2 dc3 ch1, (dc3 around next ch1 space ch1 x13) *dc3 ch2 dc3 into next corner space ch1, (dc3 in next ch1 space ch1 x13)* x5, slip st to top of beginning ch2 of round 16) slip to ch2 space, sc around and ch2 dc2 ch2 dc3 ch1, (dc3 around next ch1 space ch1 x14) *dc3 ch2 dc3 into next corner space ch1, (dc3 in next ch1 space ch1 x14)* x5, slip st to top of beginning ch2 of round. Sew in ends Tie in to a space Navy Rounds, as above increasing naturally as you progress Sew in 17) slip to ch2 space, sc around and ch2 dc2 ch2 dc3 ch1, (dc3 around next ch1 space ch1 x15) *dc3 ch2 dc3 into next corner space ch1, (dc3 in next ch1 space ch1 x15)* x5, slip st to top of beginning ch2 of round 18) slip to ch2 space, sc around and ch2 dc2 ch2 dc3 ch1, (dc3 around next ch1 space ch1 x16) *dc3 ch2 dc3 into next corner space ch1, (dc3 in next ch1 space ch1 x16)* x5, slip st to top of beginning ch2 of round. Sew in ends 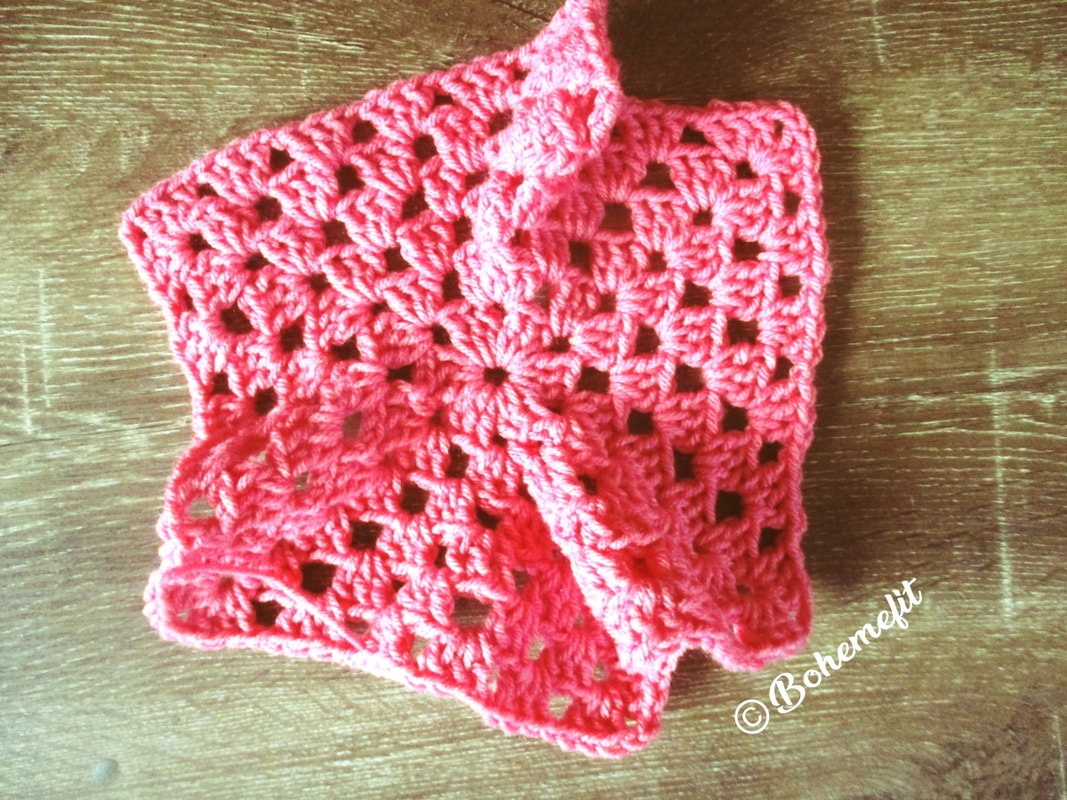 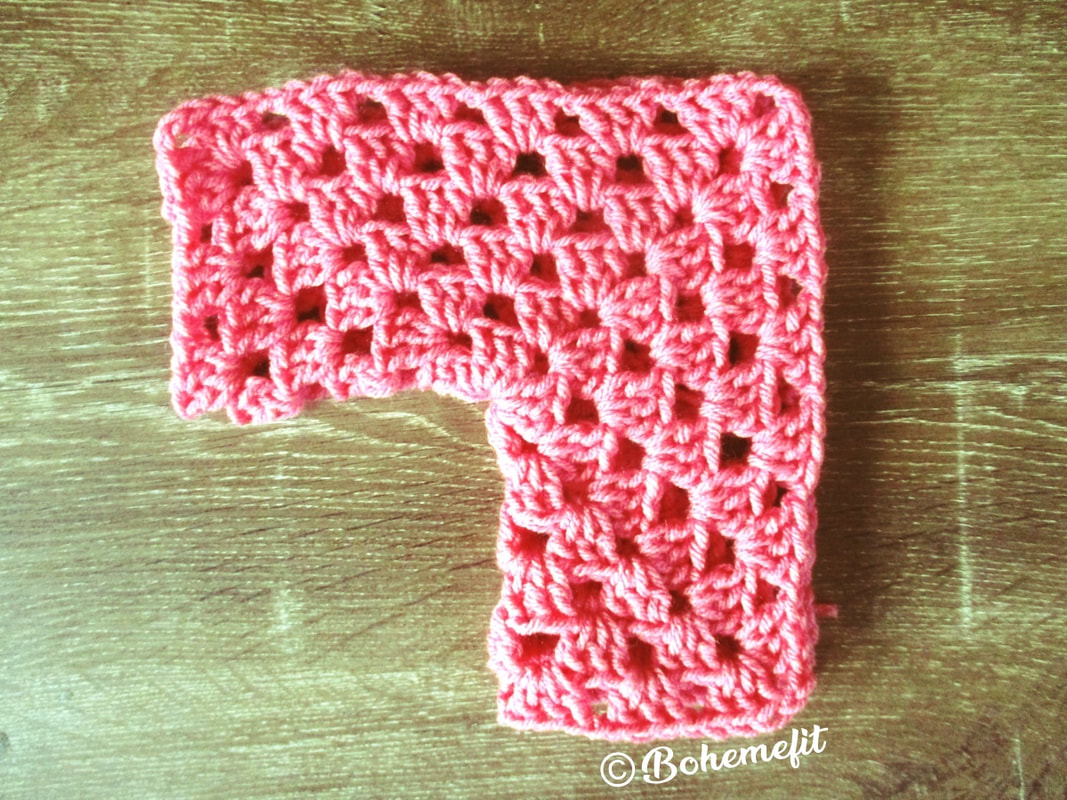 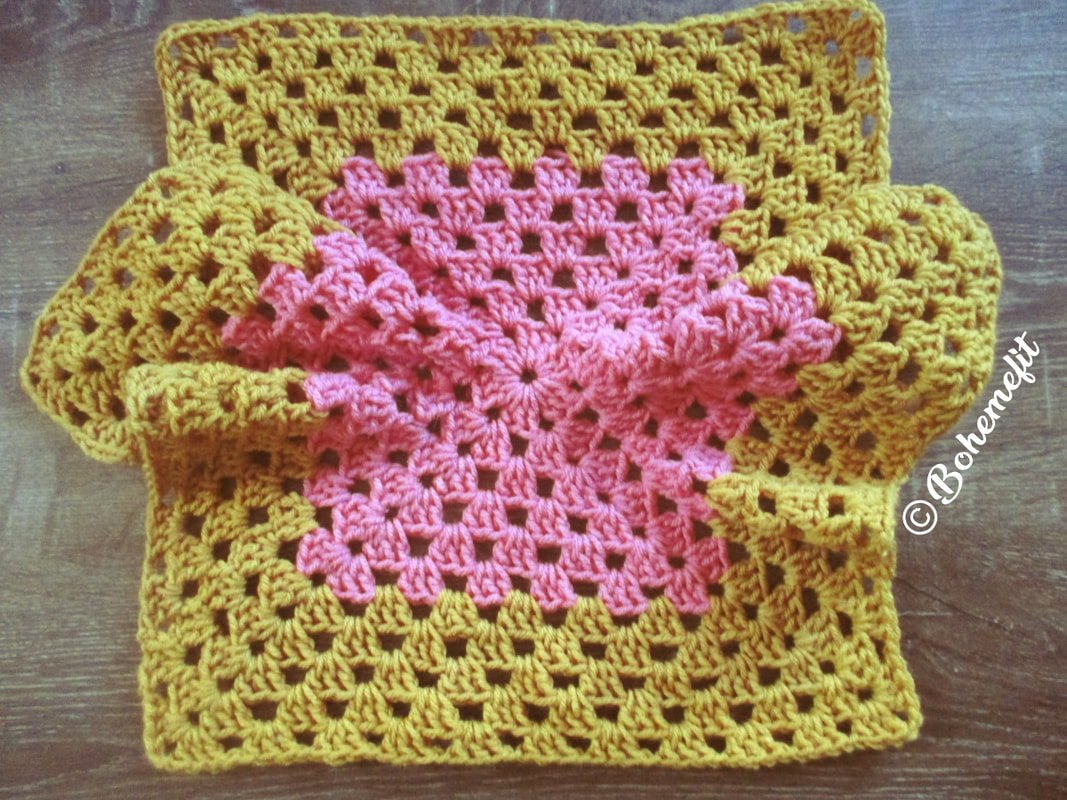 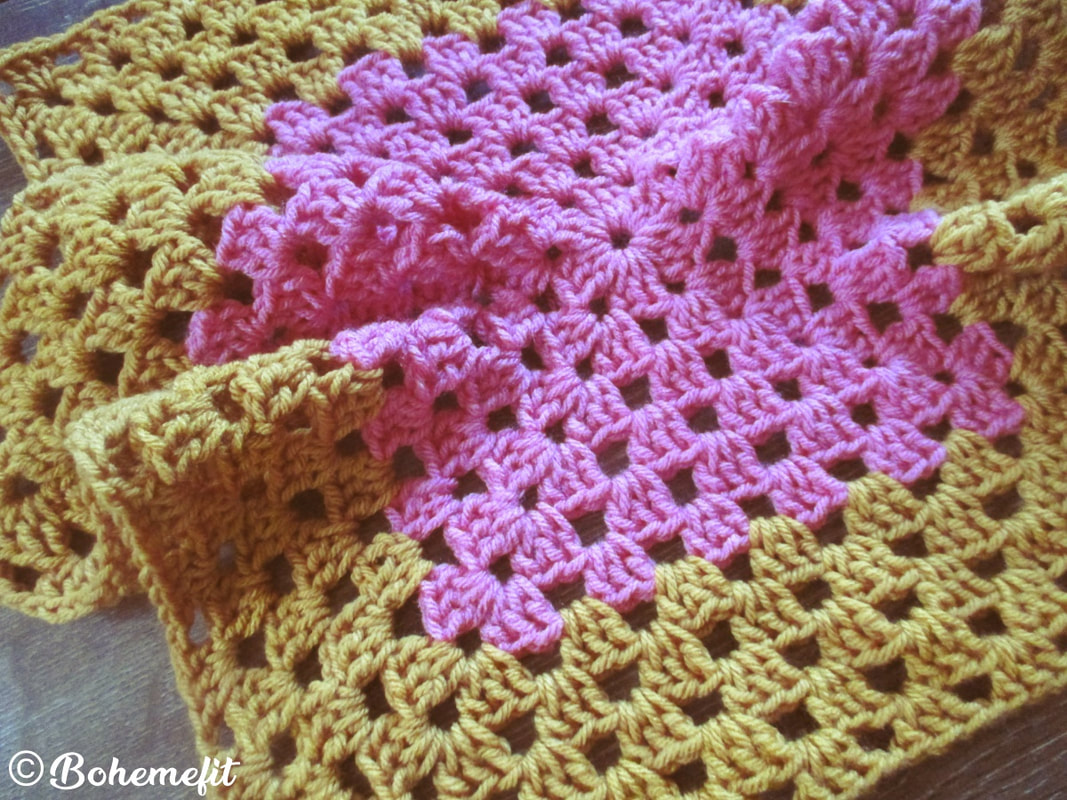
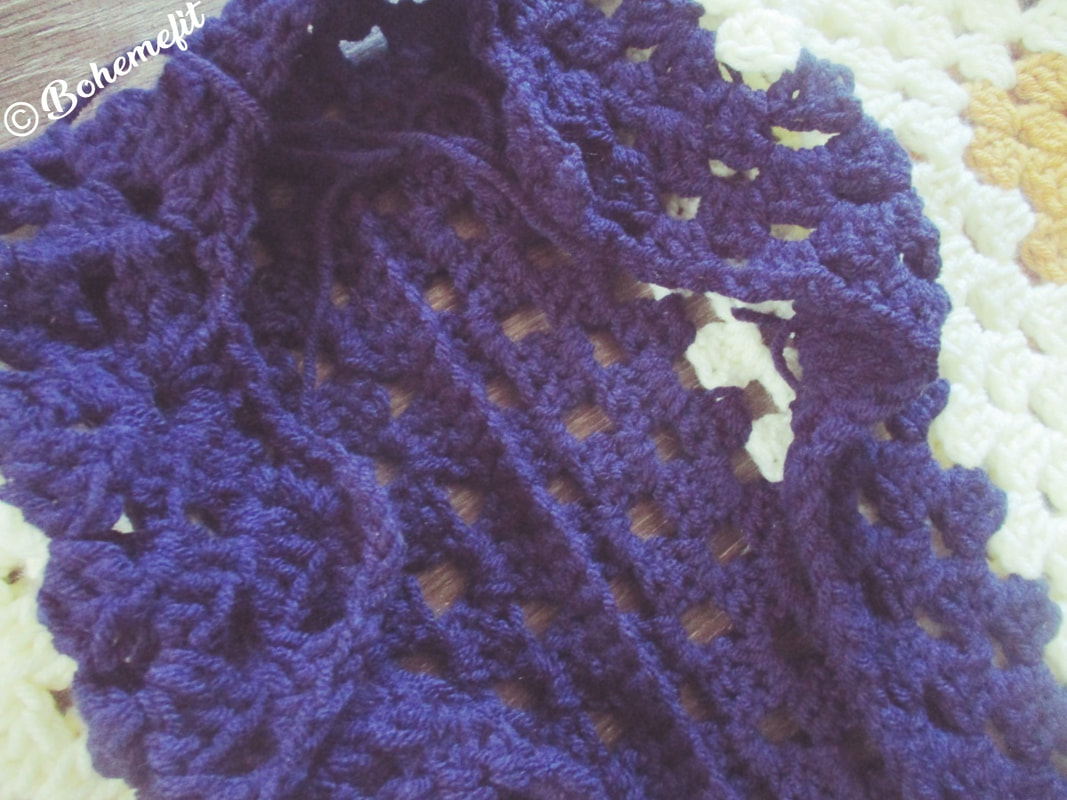
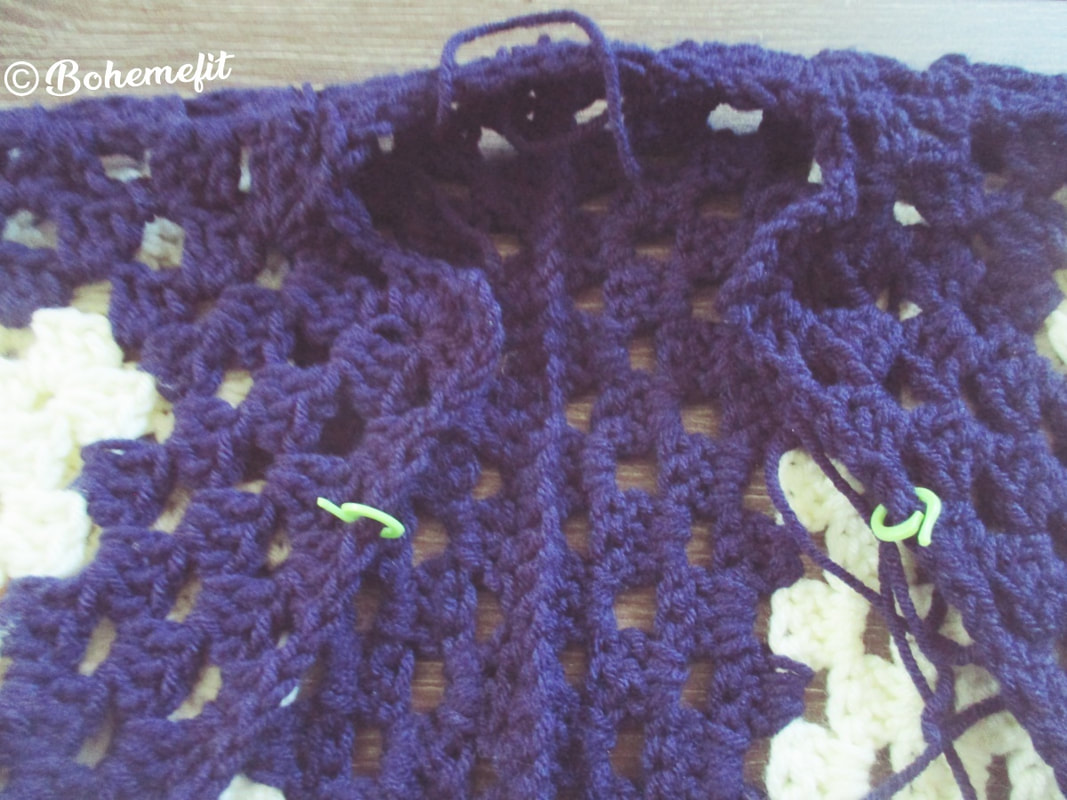
Right HexRepeat for a second or Right Hex and fold both WS facing to form, stitch mark together brackets/sleeves facing away from each other. Sleeves WS facing Seam tops of sleeve tops together on one side followed by a round of 3dc clusters on the sleeve upper or top hem, before repeating on the other sleeve (will add more rows later) 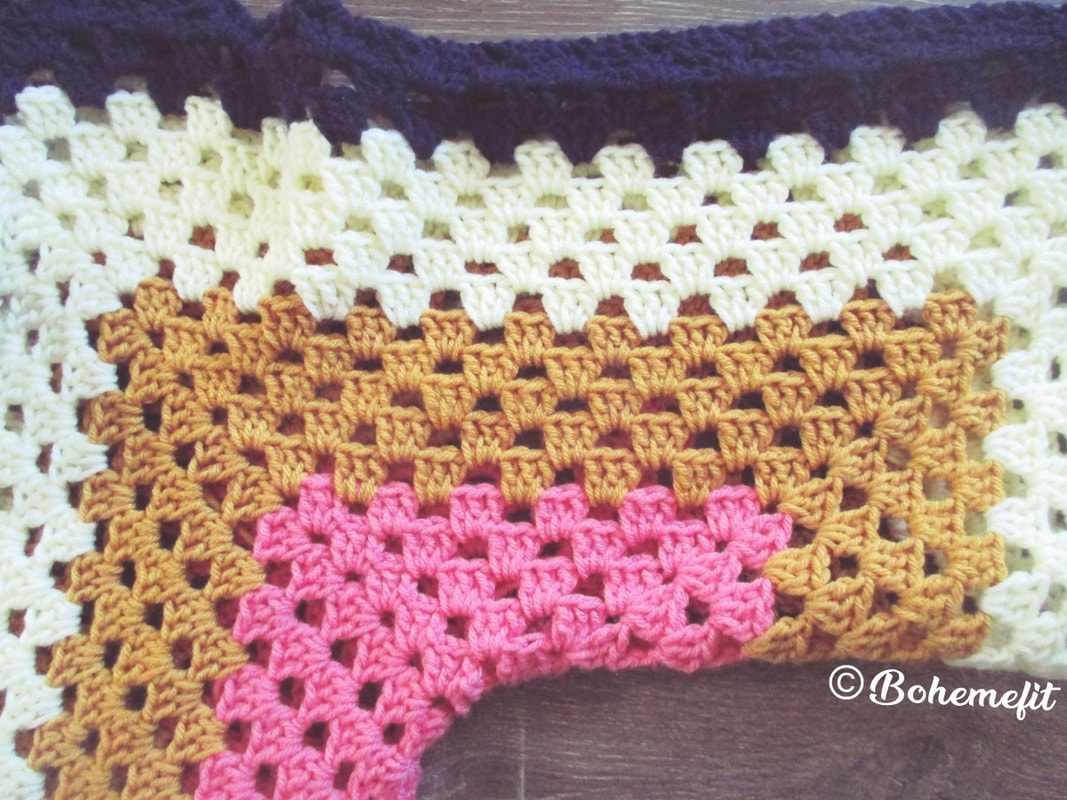 Front vertical rowsWork 3 more Rows in Navy (forming 5 rows on the vertical front of work to one side, working up and down stopping at neck working up from front of hem and back on left side then right, continue up the right collar to form cluster collar and neaten edge. Where there is no ch space but clusters at beg or end of rounds ch3 to act as a dc/ch1. Repeat on the other Hex/or side of the vertically. 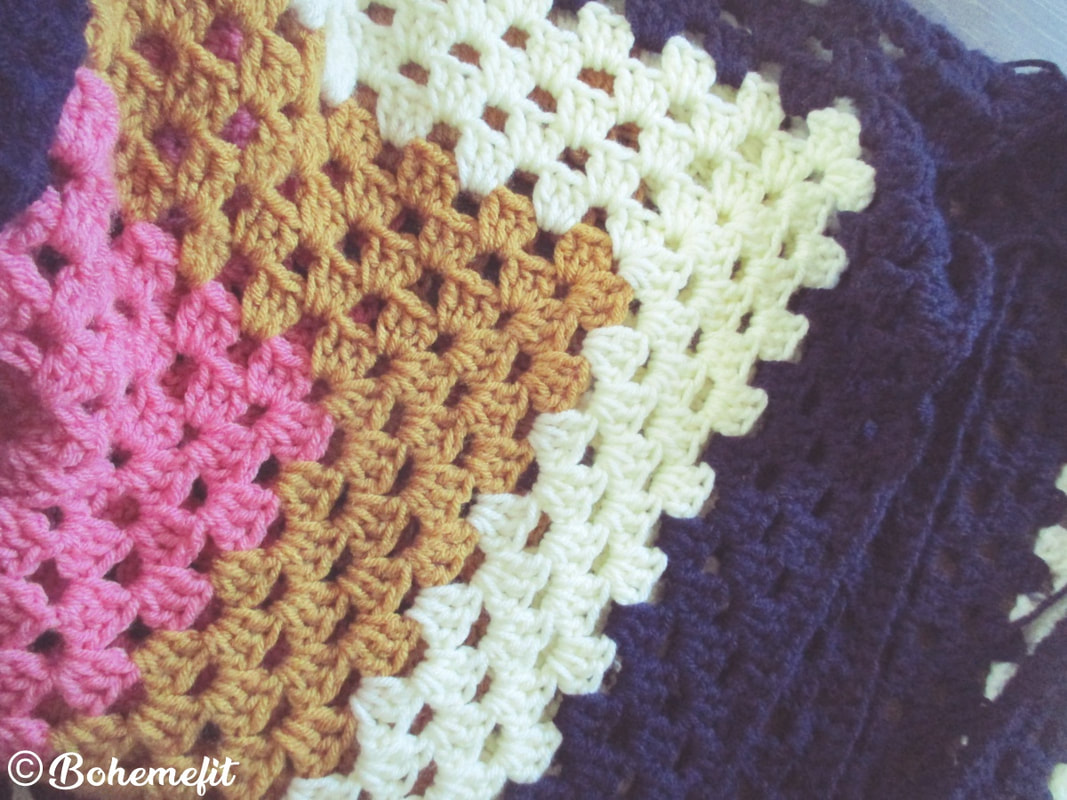 Back seam RS facingComplete 4 rows of Navy at the back vertical seam on one side to stop at top of sleeve/row leaving the dc cluster join free which will create neckline space between front and back of the piece, repeat the seam rows of the other folded Hex WS facing sc stitch together both of the pieces tog. to seam join the back of the two pieces. When starting a row in a no ch space, chain 3 to form 1dc/ch1 instead, slipping into the top of the first stitch in the row. 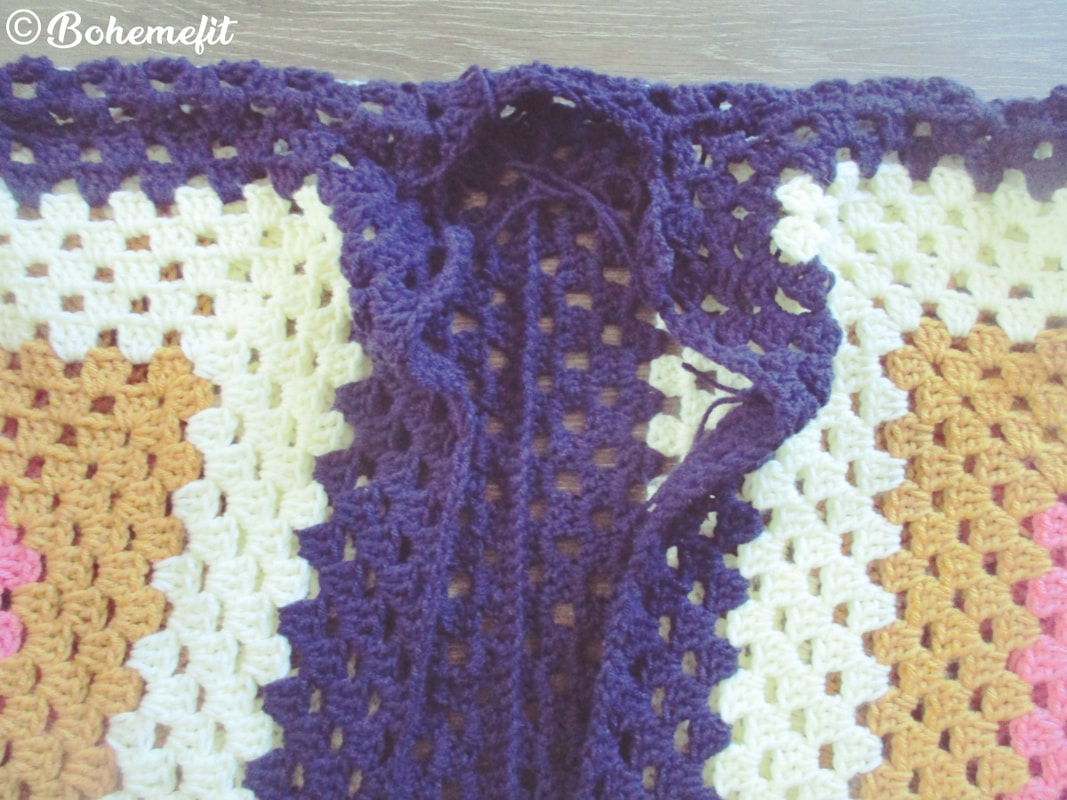 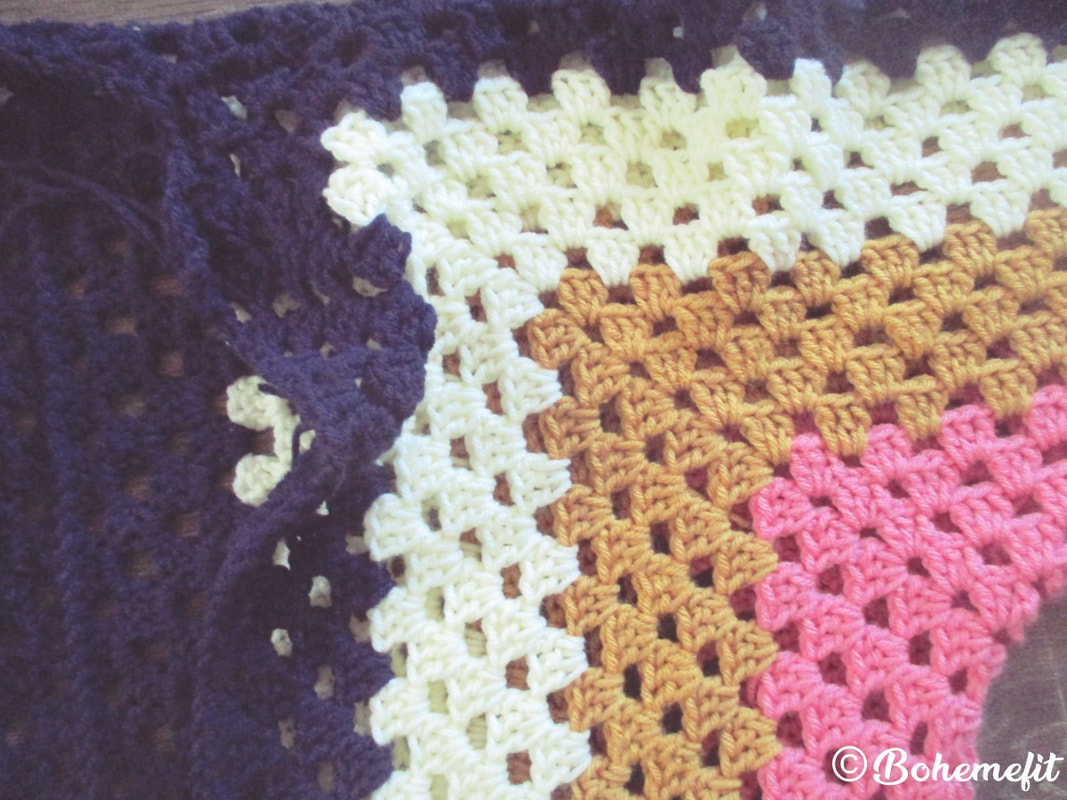 Hem Each sleeveAdd 9 cluster rounds of dc3/ch1 to sleeve to form a long banded cuff;
  Torso HemlineAdd 8 cluster dc3/ch1 rows to bottom/hem (will slip stitch vertical edges and hem when part 2 'the hood' is done - stay tuned);
Adding Collar (To become the base of a Hood in Part 2)...Torso starting right collar corner down the vertical edge in 3dc clusters/ch1 space to front corner around back to left front corner up the vertical to left top of collar
  In ClosingHeavy cozy and warm... Stay tuned for the Hood shaped addition... 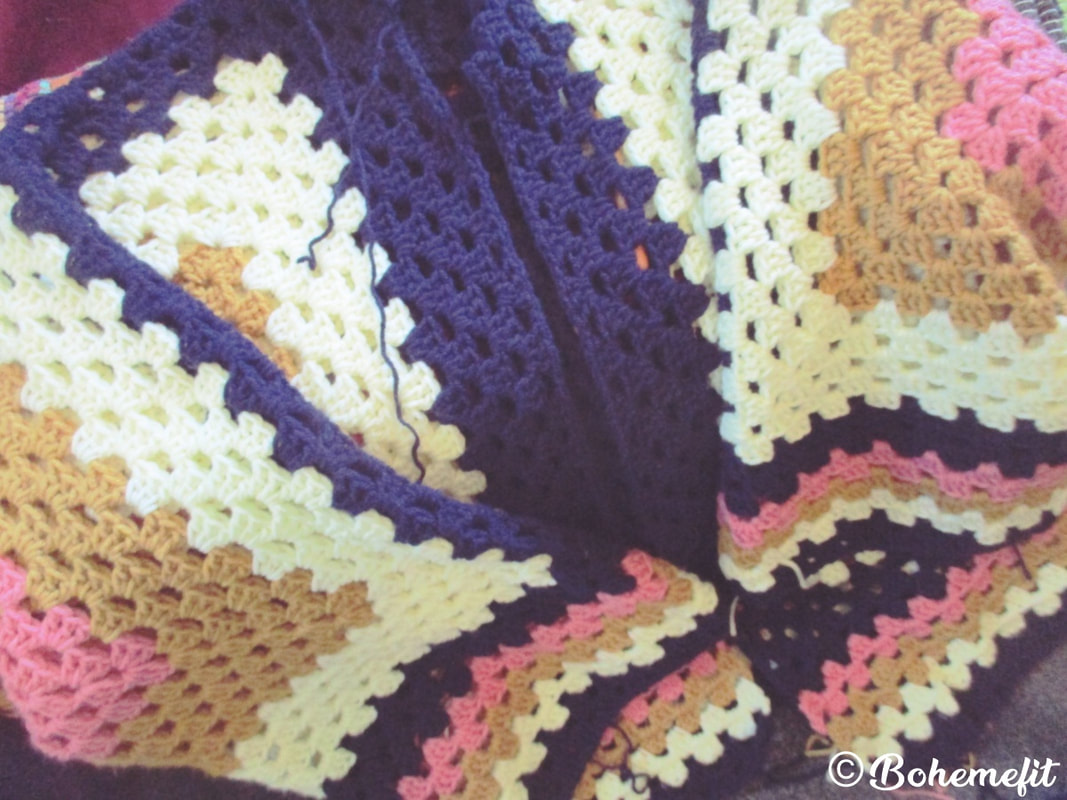 Thank-you for reading, Stay tuned for more... From In Garn Chapter 'Covers'AuthorRavenmor Fox is a Druid & Witch of the old ways, with Maternal and Paternal blood lines to each respective clans, along with being Priestess of the Morrigan, Permaculturist and Horticulturist. Raven loves crafting in ways of manner including with yarn and prepping for self sustainability, aiming to finally get out on an acreage here in the Australian bush someday. More Posts...Support on Youtube...Support my work and don’t miss a vlog post on youtube by signing up to the podcast channel there Support on Pinterest...
Disclaimer: This is not a paid presentation and any opinions are my own as well as not being affiliate in anyway. © Bohemefit
Originally published November 14th 2023-11-14
0 Comments
Your comment will be posted after it is approved.
Leave a Reply. |

© 2014 Bohemefit for Fuerza International. No content or information herein may be used elsewhere on social media, without written permission, yet alone be out of context and or for content on other social media sites.
Social media


Blog Sistersites


Pinterest Sistersites


Archives
December 2023
|

 RSS Feed
